安装获取温度软件:
apt install lm-sensors
apt install hddtemp
chmod +s /usr/sbin/hddtemp
修改/usr/share/perl5/PVE/API2/Nodes.pm:
PVE::pvecfg::version_text();
#以下为添加
$res->{thermal} = `sensors -j`;
$res->{thermal_hdd} = `hddtemp /dev/sd?`;
#结束
my $dinfo = df('/', 1);     # output is bytes
修改/usr/share/pve-manager/js/pvemanagerlib.js:
{
        itemId: 'version',
                colspan: 2,
                printBar: false,
                title: gettext('PVE Manager Version'),
                textField: 'pveversion',
                value: '',
},
#以下为添加内容
        {
                itemId: 'thermal',
                colspan: 2,
                printBar: false,
                title: gettext('CPU/主板温度'),
                textField: 'thermal',
                renderer: function(value) {
                        //value = JSON.parse(value.replaceAll('Â', ''));
                        value = JSON.parse(value);
                        const cpu0 = value['coretemp-isa-0000']['Package id 0']['temp1_input'].toFixed(1);
                        const cpu1 = value['coretemp-isa-0000']['Core 0']['temp2_input'].toFixed(1);
                        const cpu2 = value['coretemp-isa-0000']['Core 1']['temp3_input'].toFixed(1);
                        const cpu3 = value['coretemp-isa-0000']['Core 2']['temp4_input'].toFixed(1);
                        const cpu4 = value['coretemp-isa-0000']['Core 3']['temp5_input'].toFixed(1);
                        const board = value['acpitz-acpi-0']['temp1']['temp1_input'].toFixed(1);
                        return `Package: ${cpu0}°C | Core: ${cpu1}° C | ${cpu2}° C | ${cpu3}° C | Board: ${board}°C`;
                }
        },
        {
                itemId: 'thermal-hdd',
                colspan: 2,
                printBar: false,
                title: gettext('硬盘温度'),
                textField: 'thermal_hdd',
                renderer: function(value) {
                        value = value.replaceAll('Â', '');
                        return value.replaceAll('\n', '<br>');
                }
        },
#结束
],
修改显示区域高度:
Ext.define('PVE.node.StatusView', {
    extend: 'Proxmox.panel.StatusView',
    alias: 'widget.pveNodeStatus',
    #height: 300,
    height: 450,
    bodyPadding: '15 5 15 5',

    layout: {
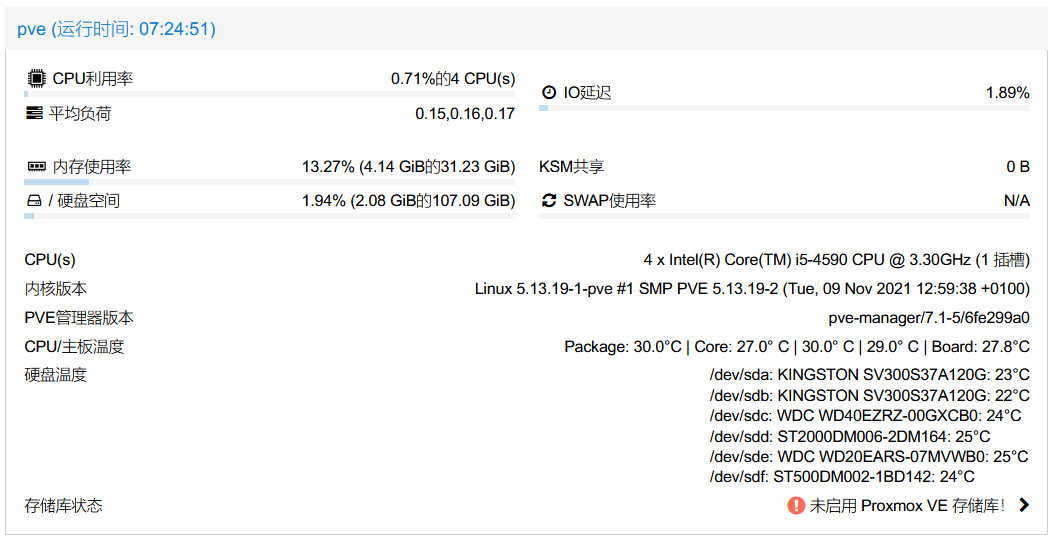
效果如下:
参考:
https://64g.cc/index.php/2021/07/18/proxmox-7-0-%E6%B7%BB%E5%8A%A0cpu-nvme-hdd%E6%B8%A9%E5%BA%A6%E7%9B%91%E6%8E%A7/
https://zry.io/archives/285