编译ipxe,也可从netboot.xyz下载编译好的,netboot默认包含一些常用系统的安装规则。
apt install git make gcc mtools binutils liblzma-dev -y
git clone git://git.ipxe.org/ipxe.git
cd ipxe/src
sed -i -e '/DOWNLOAD_PROTO_HTTPS/ s/#undef/#define/' config/general.h
sed -i 's/#undef\tDOWNLOAD_PROTO_NFS/#define\tDOWNLOAD_PROTO_NFS/' config/general.h
sed -i 's/\/\/#define\ PING_CMD/#define\ PING_CMD/' config/general.h
sed -i 's/\/\/#define\ IPSTAT_CMD/#define\ IPSTAT_CMD/' config/general.h
sed -i 's/\/\/#define\ REBOOT_CMD/#define\ REBOOT_CMD/' config/general.h
sed -i 's/\/\/#define\ POWEROFF/#define\ POWEROFF/' config/general.h
make bin/ipxe.lkrn
如需iso:
apt install genisoimage isolinux
make bin/ipxe.iso
加入grub引导项,set root为boot目录所在分区,/ipxe.lkrn为文件相对于boot所在分区的绝对路径,如果boot为单独分区刚为/ipxe.lkrn,非单独分区为/boot/ipxe.lkrn,hd0为第一个硬盘,msdos1为第一个mbr分区,如果是gpt使用gpt1。
cat >> /etc/grub.d/40_custom <<EOF
menuentry 'ipxe boot' {
    set root='hd0,msdos1'
    linux16 /ipxe.lkrn
    initrd16 /ipxe.initrd
}
EOF
sed -i 's/GRUB_DEFAULT=.*/GRUB_DEFAULT="ipxe boot"/' /etc/default/grub
grub2-mkconfig -o /boot/grub2/grub.cfg
调用ipxe规则的几种方法:
1.grub引导参数和HTTP调用远程文件:
#ipxe启动后dhcp获取IP然后获取netboot规则。
linux16 /ipxe.lkrn dhcp && chain --autofree https://boot.netboot.xyz
2.本地文件ipxe.initrd:
#!ipxe
imgfree
set net0/ip 192.168.168.4
set net0/netmask 255.255.255.0
set net0/gateway 192.168.168.1
set dns 192.168.168.1
ifopen net0
chain --autofree https://boot.netboot.xyz
3.编译时也可将规则嵌入进去:
make bin/ipxe.lkrn EMBED=boot.ipxe
centos7 ipx网络安装规则:
#!ipxe
set base http://mirrors.aliyun.com/centos/7/os/x86_64
kernel ${base}/images/pxeboot/vmlinuz inst.repo=${base} ks=https://www.haiyun.me/centos7.cfg inst.vnc inst.vncpassword=12345678 net.ifnames=0 biosdevname=0 inst.headless ip=192.168.168.4::192.168.168.1:255.255.255.0::eth0:none nameserver=192.168.168.1
initrd ${base}/images/pxeboot/initrd.img
boot
生成ubuntu ipxe网络安装规则:
#!/bin/bash
set -x
network=dhcp
network=static
release=bionic
release=focal
address=192.168.1.9
netmask=255.255.255.0
gateway=192.168.1.1
nameserver=192.168.1.1
mirror="http://mirrors.aliyun.com"
mirror="http://archive.ubuntu.com"
cfg="https://www.haiyun.me/ubuntu.cfg"
file="ubuntu.ipxe"
#file="/www/ubuntu.ipxe"
if [ "$release" == 'focal' ]; then
  base=${mirror}/ubuntu/dists/${release}/main/installer-amd64/current/legacy-images/netboot/ubuntu-installer/amd64
else
  base=${mirror}/ubuntu/dists/${release}/main/installer-amd64/current/images/netboot/ubuntu-installer/amd64
fi

if [ "$network" == 'static' ]; then
  cat > $file << EOF
#!ipxe
kernel ${base}/linux auto=true url=${cfg} keymap=us domain= hostname=ubuntu-server interface=auto netcfg/get_ipaddress=${address} netcfg/get_netmask=${netmask} netcfg/get_gateway=${gateway} netcfg/get_nameservers=${nameserver} netcfg/disable_autoconfig=true netcfg/do_not_use_netplan=true
initrd ${base}/initrd.gz
boot
EOF
else
  cat > $file << EOF
#!ipxe
kernel ${base}/linux auto=true url=${cfg} keymap=us domain= hostname=ubuntu-server interface=auto netcfg/do_not_use_netplan=true
initrd ${base}/initrd.gz
boot
EOF
fi
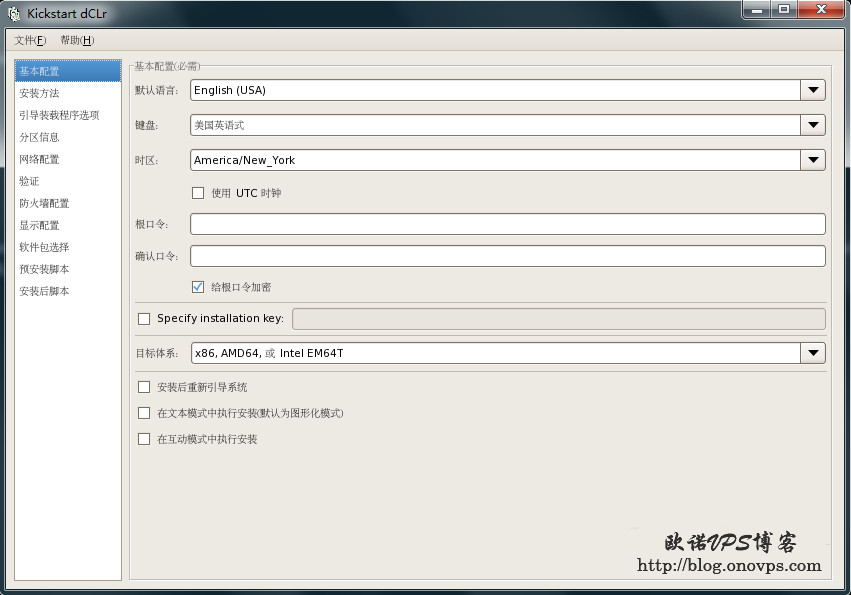
kickstart文件:
install
#url --url="http://mirror.centos.org/centos/7/os/x86_64/"
url --url="http://mirrors.aliyun.com/centos/7/os/x86_64/"
text
skipx
unsupported_hardware
eula --agreed

#rootpw --plaintext 123456
#echo 'import crypt,getpass; print crypt.crypt(getpass.getpass(), "$6$16_CHARACTER_SALT_HERE")' | python -
rootpw --iscrypted $6$16_CHARACTER_SAL$dvFZEFR66m38M3u3K4os2Yi4j88oTRaF9Q7XkKK4VFlMlwS9l17oTjXI043rfpNxDkB8/1ntrOiAFQGeYgwEZ.
authconfig --enableshadow --passalgo=sha512

keyboard --vckeymap=us --xlayouts='us'
lang en_US.UTF-8
timezone Asia/Shanghai

firstboot --disable
firewall --disabled
selinux --disabled

#network --bootproto=static --device=eth0 --gateway=192.168.168.1 --ip=192.168.168.50 --nameserver=192.168.168.1 --netmask=255.255.255.0 --ipv6=auto --activate
network --hostname=centos7-x64

reboot
services --enabled="chronyd"

zerombr
clearpart --all --drives=sda
ignoredisk --only-use=sda
bootloader --append=" crashkernel=auto" --location=mbr --boot-drive=sda
#autopart --type=lvm

#part / --asprimary --fstype ext4 --size=5120
#part swap --asprimary --size=1024
#part /home --asprimary --fstype ext4 --size=5120 --grow

part /boot --fstype ext4 --size 200 --asprimary
part swap  --size 1024 --asprimary
part pv.01 --size 1 --grow --asprimary
volgroup rootvg pv.01
logvol / --fstype ext4 --vgname=rootvg --size=1 --grow --name=rootlv

vnc --password=12345678

#repo --name=base --baseurl=http://mirror.centos.org/centos/7/os/x86_64/

%packages
@^minimal
@core
chrony
kexec-tools

%end
ubuntu18.04 ipx网络安装规则:
#!ipxe
set mirror https://mirrors.aliyun.com/
set release bionic
set arch amd64
set base-url ${mirror}/ubuntu/dists/${release}/main/installer-${arch}/current/images/netboot/ubuntu-installer/${arch}
kernel ${base-url}/linux auto=true url=https://www.haiyun.me/ubuntu.cfg keymap=us domain= hostname=ubuntu-server interface=auto netcfg/get_ipaddress=192.168.168.4 netcfg/get_netmask=255.255.255.0 netcfg/get_gateway=192.168.168.1 netcfg/get_nameservers=192.168.168.1 netcfg/disable_dhcp=true
initrd ${base-url}/initrd.gz
boot
preseed文件:
d-i debian-installer/locale string en_US
d-i console-setup/ask_detect boolean false
d-i keyboard-configuration/xkb-keymap select us

#使用静态IP
#d-i netcfg/choose_interface select auto
#d-i netcfg/disable_autoconfig boolean true
#d-i netcfg/dhcp_failed note
#d-i netcfg/dhcp_options select Configure network manually
#d-i netcfg/get_ipaddress string 192.168.168.4
#d-i netcfg/get_netmask string 255.255.255.0
#d-i netcfg/get_gateway string 192.168.168.1
#d-i netcfg/get_nameservers string 192.168.168.1
#d-i netcfg/confirm_static boolean true
#d-i netcfg/get_hostname string ubuntu-server
#d-i netcfg/get_domain string
d-i hw-detect/load_firmware boolean true

d-i mirror/country string manual
#d-i mirror/http/hostname string mirrors.aliyun.com
d-i mirror/http/hostname string archive.ubuntu.com
d-i mirror/http/directory string /ubuntu
d-i mirror/http/proxy string

d-i passwd/root-login boolean ture
d-i passwd/make-user boolean false
#d-i passwd/root-password password 123456
#d-i passwd/root-password-again password 123456
#echo 'import crypt,getpass; print crypt.crypt(getpass.getpass(), "$6$16_CHARACTER_SALT_HERE")' | python -
d-i passwd/root-password-crypted password $6$16_CHARACTER_SAL$CIIxSZip5SHbUDtMlgweMCsEMqUsp4kGjo
d-i user-setup/allow-password-weak boolean true
d-i user-setup/encrypt-home boolean false

d-i clock-setup/utc boolean false
d-i time/zone string Asia/Shanghai
d-i clock-setup/ntp boolean true


#d-i partman-auto/disk string /dev/sda
d-i partman/early_command string debconf-set partman-auto/disk "$(list-devices disk | head -n1)"
d-i partman-lvm/device_remove_lvm boolean true
d-i partman-md/device_remove_md boolean true
d-i partman-partitioning/confirm_write_new_label boolean true
d-i partman/choose_partition select finish
d-i partman/confirm boolean true
d-i partman/confirm_nooverwrite boolean true
d-i partman/default_filesystem string ext4
d-i partman/mount_style select uuid


d-i partman-auto/choose_recipe select boot-root
d-i partman-auto/method string regular
d-i partman-auto/expert_recipe string                         \
      boot-root ::                                            \
              5120 1 5120 ext4                                \
                     $primary{ } $bootable{ }                 \
                     method{ format } format{ }               \
                     use_filesystem{ } filesystem{ ext4 }     \
                     mountpoint{ / }                          \
              .                                               \
              1 3 -1 ext4                                     \
                      $primary{ }                             \
                      method{ format } format{ }              \
                      use_filesystem{ } filesystem{ ext4 }    \
                      mountpoint{ /home }                     \
              .                                               \
              1024 2 1024 linux-swap                          \
                      $primary{ }                             \
                      method{ swap } format{ }                \
              .


#d-i partman-auto/choose_recipe select boot-root
#d-i partman-auto/method string regular
#d-i partman-auto/expert_recipe string                         \
#      boot-root ::                                            \
#              1 2 -1 ext4                                     \
#                     $primary{ }                              \
#                     method{ format } format{ }               \
#                     use_filesystem{ } filesystem{ ext4 }     \
#                     mountpoint{ / }                          \
#              .                                               \
#              128 1 128 linux-swap                            \
#                      $primary{ }                             \
#                      method{ swap } format{ }                \
#              .


#d-i partman-auto/choose_recipe select boot-lvm
#d-i partman-auto/method string lvm
#d-i partman-auto-lvm/guided_size string 100%
#d-i partman-auto-lvm/new_vg_name string vg00
#d-i partman-lvm/confirm boolean true
#d-i partman-lvm/confirm_nooverwrite boolean true
#d-i partman-auto/expert_recipe string                         \
#      boot-lvm ::                                             \
#              1024 1 1024 ext4                                \
#                      $primary{ } $bootable{ }                \
#                      method{ format } format{ }              \
#                      use_filesystem{ } filesystem{ ext4 }    \
#                      mountpoint{ /boot }                     \
#              .                                               \
#              1 2 -1 ext4                                     \
#                      $primary{ }                             \
#                      $defaultignore{ }                       \
#                      method{ lvm }                           \
#                      device{ /dev/sda }                      \
#                      vg_name{ vg00 }                         \
#              .                                               \
#              1024 3 1024 swap                                \
#                      $lvmok{ } lv_name{ lv_swap } in_vg{ vg00 } \
#                      method{ swap } format{ }                   \
#          .                                                      \
#              1 4 -1 ext4                                        \
#                      $lvmok{} lv_name{ lv_root } in_vg{ vg00 }  \
#                      method{ format } format{ }                 \
#                      use_filesystem{ } filesystem{ ext4 }       \
#                      mountpoint{ / }                            \
#          .


tasksel tasksel/first multiselect minimal
d-i pkgsel/update-policy select none
d-i pkgsel/include string openssh-server vim wget tmux net-tools software-properties-common
d-i pkgsel/upgrade select none

d-i grub-installer/only_debian boolean true
d-i grub-installer/bootdev string default
d-i finish-install/reboot_in_progress note
d-i debian-installer/exit/reboot boolean true
d-i preseed/late_command string cd /target/;\
    echo 'UseDNS no' >> etc/ssh/sshd_config;\
    echo 'AddressFamily inet' >> etc/ssh/sshd_config;\
    echo 'PermitRootLogin yes' >> etc/ssh/sshd_config;

#d-i anna/choose_modules string network-console
#d-i network-console/password password 123456
#d-i network-console/password-again password 123456
注:Centos7安装内存不得小于2G,可不使用ipxe直接下载centos/ubuntu网络安装文件到本地添加到grub自动安装,使用ipxe方便管理。
参考:
https://netboot.xyz/providers/digitalocean/
https://access.redhat.com/documentation/zh-cn/red_hat_enterprise_linux/7/html/installation_guide/chap-anaconda-boot-options
https://access.redhat.com/documentation/zh-cn/red_hat_enterprise_linux/7/html/installation_guide/sect-kickstart-syntax
https://help.ubuntu.com/lts/installation-guide/amd64/apbs02.html
https://help.ubuntu.com/lts/installation-guide/amd64/apbs04.html
https://help.ubuntu.com/lts/installation-guide/example-preseed.txt