右键Host拖入工作区,右键配置——NIO UDP,添加相应端口后面配置VPCS会用到,用做VPCS和路由连接。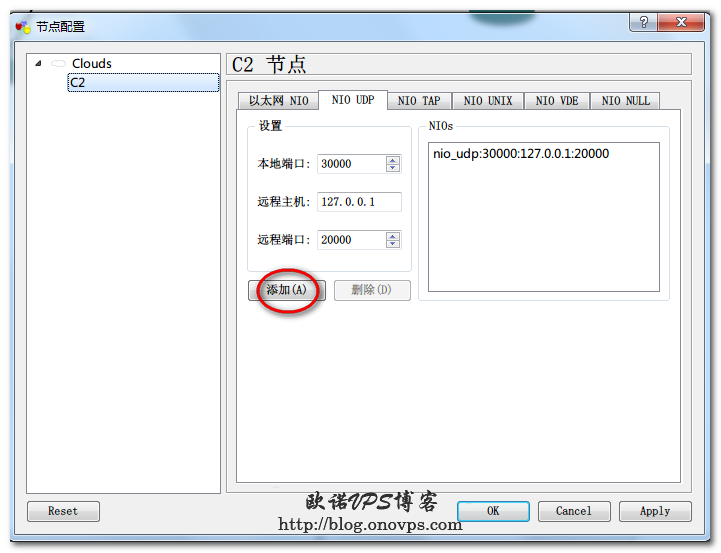
连接路由和Host设备。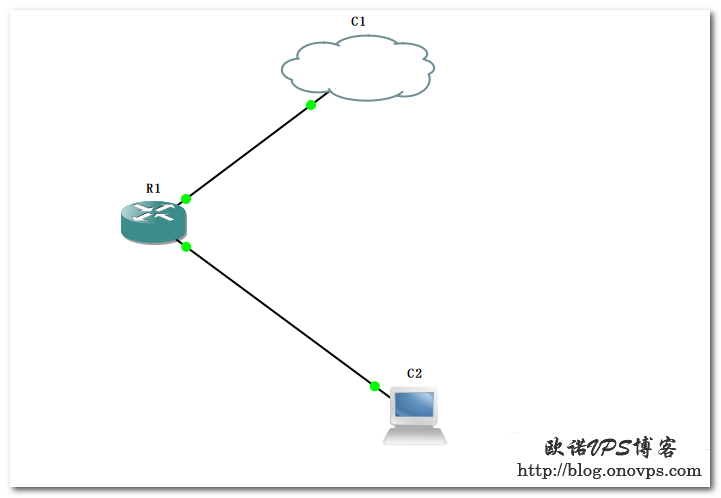
查看VPCS配置: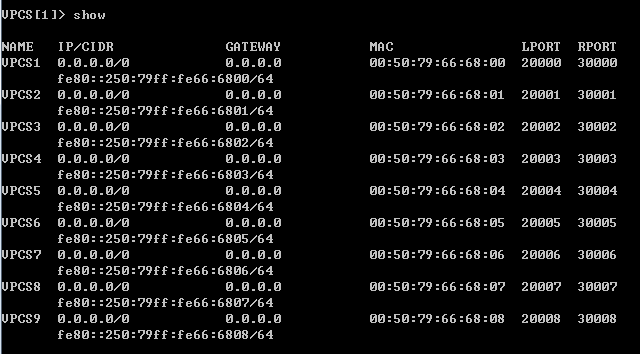
配置VPCS IP:
1 #进入与之前UDP PIO相对应的虚拟界面,本地端口20000
ip 192.168.30.2 192.168.30.1 24
在VSCS虚拟电脑内ping测试: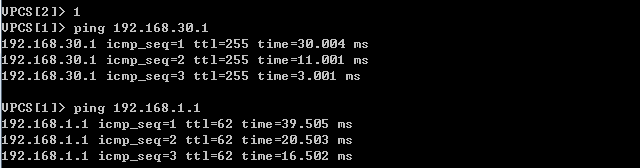
发布时间:July 25, 2012 // 分类:Cisco // No Comments
右键Host拖入工作区,右键配置——NIO UDP,添加相应端口后面配置VPCS会用到,用做VPCS和路由连接。
连接路由和Host设备。
查看VPCS配置:
配置VPCS IP:
1 #进入与之前UDP PIO相对应的虚拟界面,本地端口20000
ip 192.168.30.2 192.168.30.1 24在VSCS虚拟电脑内ping测试:
发布时间:July 24, 2012 // 分类:VMware,Cisco // No Comments
实验环境如下:
VMware新建ROS虚拟机,Wan端以桥接方式连接,IP:192.168.1.21,
Lan端以Host-only连接,IP:192.168.40.2
GNS3运行Cisco路由连接ROS Lan端,FastEthernet0/0 IP:192.168.40.3
FastEthernet0/1 IP:192.168.30.1
VMware网络查看: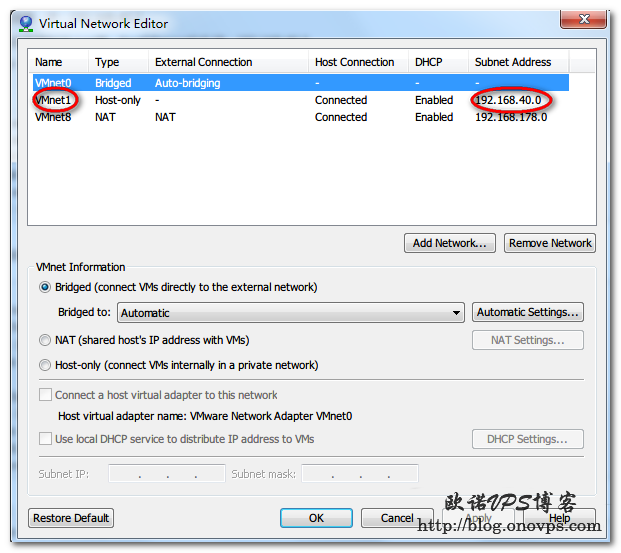
配置ROS网卡为host-only:
ROS内配置:
#https://www.haiyun.me
ip address add address=192.168.1.21/24 interface=ether1
ip address add address=192.168.40.2/24 interface=ether2
ip route add gateway=192.168.1.1
ip route add dst-address=192.168.30.0/24 gateway=192.168.40.3
ip dns set servers=192.168.1.1
ip firewall nat add chain=srcnat src-address=192.168.40.0/24 action=masquerade
GNS3工作区,Cloud添加vmnet1(Host-only),并用连接线连接到Router FastEthernet0/0。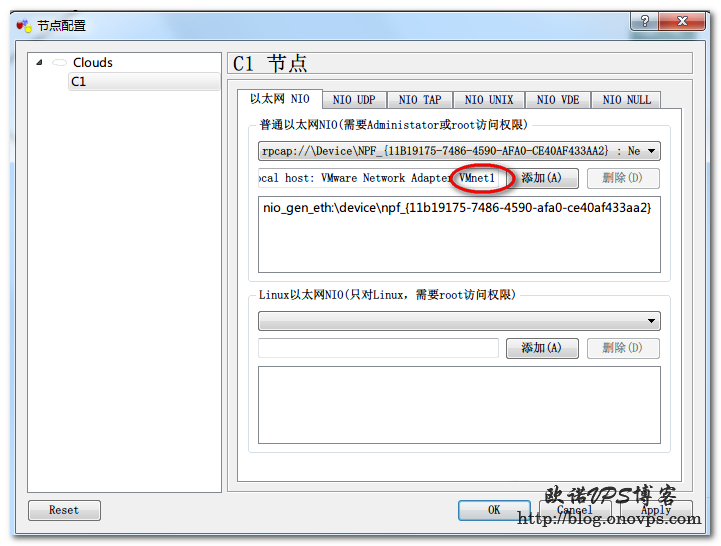
Router配置:
enable
configure terminal
interface fastEthernet 0/0
ip address 192.168.40.3 255.255.255.0
no shutdown
exit
interface fastEthernet 0/1
ip address 192.168.30.1 255.255.255.0
no shutdown
ip route 0.0.0.0 0.0.0.0 192.168.40.2
ip name-server 192.168.1.1
Router内Ping测试:
Router#ping 192.168.40.2

Type escape sequence to abort.
Sending 5, 100-byte ICMP Echos to 192.168.40.2, timeout is 2 seconds:
!!!!!
Success rate is 100 percent (5/5), round-trip min/avg/max = 8/24/56 ms
Router#ping 192.168.1.1

Type escape sequence to abort.
Sending 5, 100-byte ICMP Echos to 192.168.1.1, timeout is 2 seconds:
!!!!!
Success rate is 100 percent (5/5), round-trip min/avg/max = 8/11/12 ms
Router#ping www.haiyun.me
Translating "www.haiyun.me"...domain server (192.168.1.1) [OK]

Type escape sequence to abort.
Sending 5, 100-byte ICMP Echos to 184.164.141.188, timeout is 2 seconds:
!!!!!
Success rate is 100 percent (5/5), round-trip min/avg/max = 348/354/360 ms后续也可使用VCPS虚拟PC配合GNS3进行测试。
发布时间:July 24, 2012 // 分类:Cisco,Xshell // 2 Comments
Windows 32位下:
c:\Program Files\NetSarang\Xshell 3\xshell.exe -url telnet://%h:%pWindows 64位下:
c:\Program Files (x86)\NetSarang\Xshell 3\xshell.exe -url telnet://%h:%p